We at The Hub prefer to be outside riding, running, skiing, hiking . . . well, anything outdoors. However, there are times when being indoors is necessary either because of time constraints, specific training sessions, or inclement weather. Those occurrences are so limited we don’t see the need in having a “smart” trainer or Peloton bike. Nothing but respect for those that do. Variety is the spice of life. For us, the indoor setup is circa 2008, give or take a few technological upgrades. But is a “dumb” trainer smart enough? Or, can it be? We think so.
First things first, you may be asking what is the difference between “smart” and “dumb” trainers. Put simply, a “smart” trainer talks to various cycling apps and programs (e.g., Zwift). The app talks back and controls the trainer’s functionality (resistance increases due to factors such as hills, headwinds, or drafting). Most “smart” trainers also natively track power output and cadence. A “dumb” trainer doesn’t natively do any of those things. Think of it as the classic trainer. In a nutshell, it is the iPhone v. the flip phone of the indoor cycling world, if you will. The following is a quick run down of our “dumb” trainer setup, along with a few other indoor training equipment suggestions.
The trainer setup is pretty straightforward. A bike. A wheel-on trainer, sans any technology on the trainer itself to smarten it up. Now, wait for it. . . . The components that make the difference. . . . A speed and cadence sensor on the bike. A heart rate monitor on the person. And a cycling computer to track progress, and to upload data to Strava – you know, it didn’t happen unless it’s on Strava. If you really want to smarten up a dumb trainer, add a power meter such as Garmin Rally XC200 pedals.
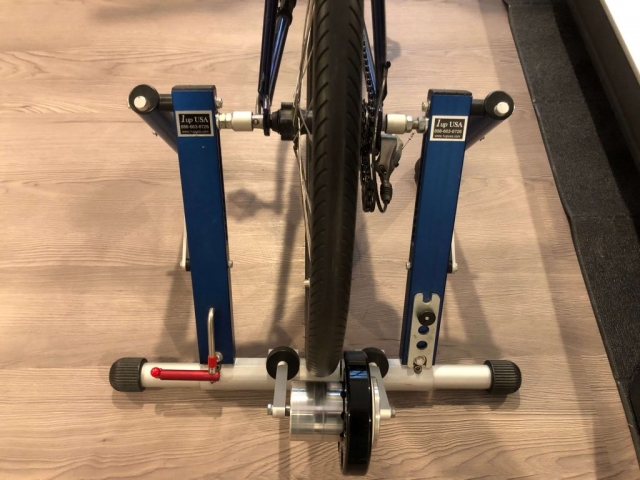
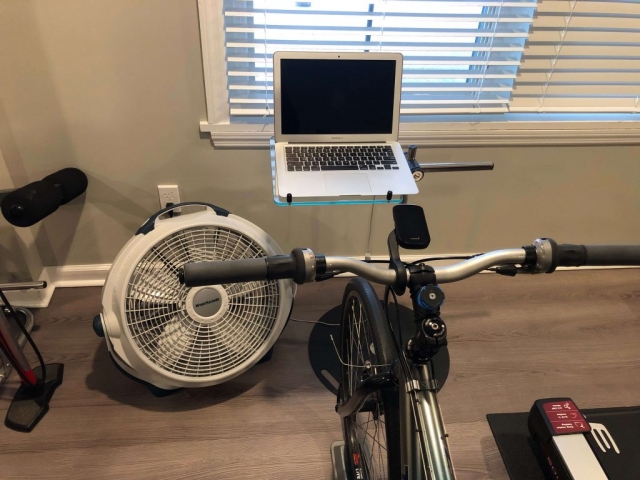
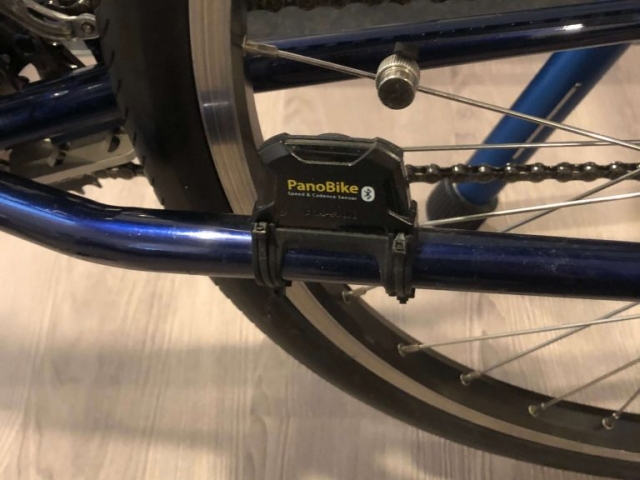
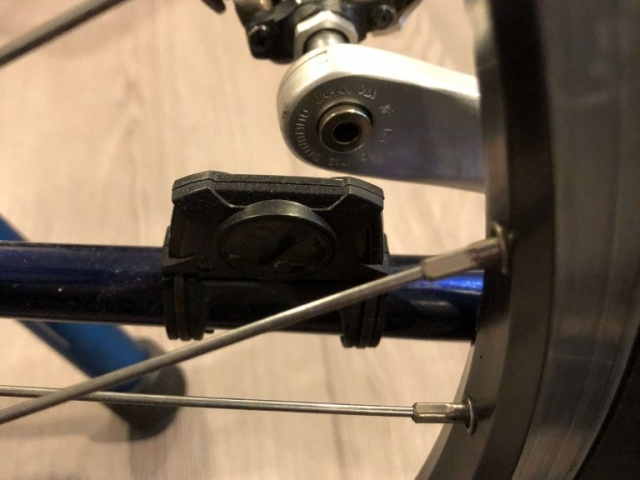
The following are some pics of the “dumb trainer” setup in all its glory:
Table of Contents
Bike Trainer Details
The above setup provides us with all we need to get in a good workout, complete any interval training, and measure important data. A power meter measuring power output would be ideal, but not necessary. The nice thing about our setup is that most of the things that smarten up the trainer are things we find pretty essential to riding outdoors. Let’s go through the setup item-by-item:
Bike
JB’s first mountain bike. You can read a quick description of it on our About page.
Trainer
The 1up USA trainer was all the rage back in the day, and still holds its own now (in our opinion). The CPR stands for centrifugal pressure resistance. This technology provides a realistic outdoor feel. When you shift to a harder gear, pedaling gets harder, and so on. There are no fluid, magnet, or wind resistance mechanisms to deal with. Simplicity at its finest. We could go on, but suffice it to say the 1up allows us to stay dumb. With pride.
Update: As December of 2022, the 1up is on the fritz. We stayed dumb with the 1up as long as possible, but are now looking looking into new trainers. Is it time to smarten up? Below are our recommendations to some common questions when trainer shopping. Please note that this is not a full-fledged review. It is just a summary of our understanding from the research we have done.
Recommendations:
- Do you go direct mount? To our knowledge, all of these trainers are smart. They are referred to as direct mount because your bike is directly mounted to a cassette that is on the trainer. No rear wheel required. From what we read, the good ones are virtually silent with a feel very similar to riding outside. And, you don’t have to worry about specific trainer tires or wheels. The biggest hinderance seems to be price. The two on our list below range from $499 to $899, unless on sale. Not to mention you can buy the crème de la crème if you want to shell out close to $1000 or more.
- Ones that catch our eye: (1) Wahoo KICKR Core and (2) Zwift:Hub (direct from Zwift).
- Do you go smart without direct mount? These trainers look like your traditional rear wheel-on dumb trainers. These trainers are more budget friendly and don’t require mounting a cassette or, in some cases, buying one to mount directly to the trainer. They are a bit pricier than dumb trainers, but you have to pay for that education somehow. . . . Get the humor!?! Sorry, couldn’t resist. The downfall is that you have to buy and maintain a trainer tire and/or wheel and have to deal with the added noise from the tire moving the trainer flywheel. There may also be more that needs done to calibrate the particular trainer, and the power data produced will be a bit less accurate. These trainers range from $369 to $499, unless on sale.
- Examples that catch our eye: (1) Wahoo KICKR Snap and (2) Garmin Tacx Flow.
- Do you stay dumb? Maybe. The no-frills dumb trainers of today will cost about $200-$300, unless on sale. If you are on a tight budget or simply want bare bones, for price alone, we’d eye up the Saris Mag+ or the Saris Mag.
Speed and cadence sensor
It is a Topeak PanoBike BLE device. The BLE stands for bluetooth low energy. This is the standard most cycling computers, smart phones, and Zwift use to talk to other devices (i.e., how the computer talks to a sensor). Garmin and Wahoo Fitness also make popular models (we have both of those as well on other bikes). Make sure the one you get is rear wheel compatible if you are using a wheel-on trainer. Some Wahoo models are not.
Recommendations: Garmin Speed Sensor 2. Wahoo RPM cadence. Boom – end of discussion!
Heart rate monitor
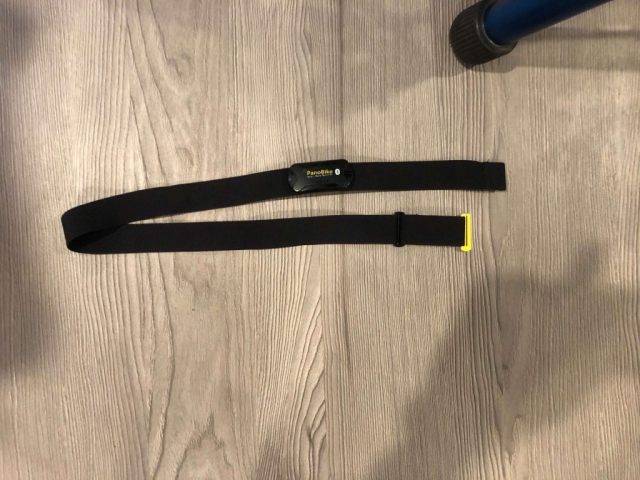
The heart rate monitor is also a Topeak PanoBike BLE device. Other brands such as Garmin and Wahoo Fitness also make heart rate monitors (we use a Wahoo as well).
Recommendations: Wahoo TICKR (without memory) or Topeak PanoBike. We like both.
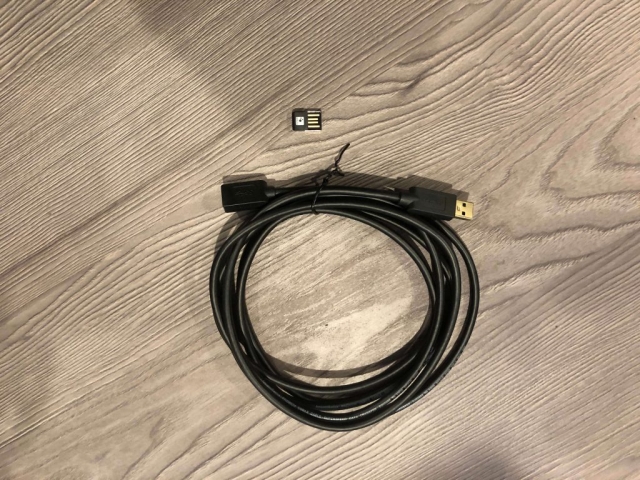
Optional: What if you have ANT+ sensors or monitors, and you want to connect to online apps? Don’t worry, you don’t have to buy new sensors and monitors. Instead, you can grab an Garmin USB ANT Stick (dongle) and a USB extension cable similar to those in the picture below.
Cycling computer
We use a Garmin Edge 530 in the indoor mode. This device tracks speed, cadence, heart rate, distance, time, etc. Pick any computer that is compatible with BLE, and you should be good to go.
What do you think – is a “Dumb” trainer smart enough?
While we call the setup “dumb,” it is actually fairly smart. So smart it is Zwift compatible. We think our “dumb” trainer setup is smart enough. It’s just not as smart as the new “smart” trainers. It also isn’t as expensive. Cha-ching, score one for The Hub!
Complete Dumb Trainer Setup Recommendation
We recommend buying a dumb trainer, the referenced sensors, and a power meter (such as the one linked above) and call it a day. You get almost all of the benefits of the smart trainers (absent the relative silence of a direct mount) and don’t sink all of your money in a trainer that could fail or become obsolete in the future. You may be asking, why would I do that when it is going to cost me as much or more than the crème de la crème direct trainers!?!? Reason – you get a power meter for your outside setup (in addition to a highly functional trainer). The nice thing about the pedals linked above is that you can switch them between bikes. Just an idea. Don’t care about power. You guessed it, just skip buying it.
As a side note, we won’t reinvent the wheel (no pun intended) on proper Zwift setup here, but check out Zwift’s literature if that’s your thang.
Other Non-Bike Equipment
The non-bike related stuff is all preference. We use a fan of some sort to increase airflow. Otherwise, you will roast. Not good. Overheating actually adds undue stress on your body, which can hinder fitness progress. As a matter of fact, some actually prefer three fans. One directed at the face, one at the torso, and one at the back.
Also, grab a few towels. Think about having one handy to wipe your face. It is also beneficial to have a few to drape over your bike or to lay on the floor. Sweat is incredibly corrosive. At the least, make sure to wipe down your bike, and whatever else needs it. Stems and other bike parts have been known to fail from excessive sweat exposure.
Finally, we suggest a computer, TV, or something to keep you entertained or to play those rockin’ old school interval workout or Tour de France videos. Our go-to in January/February, if inside, is the CTS Progressive Power series. Check out our overview of the series and subsequent follow-up summaries of the eight week series.
Also, please sign up for The Hub’s newsletter and follow us on your favorite social media channels (form and links on the right and bottom of this page). Thanks for reading! Talk to yinz soon.

